

How to Use a Spray Foam Gun (Professional Step-by-Step Guide)
A spray foam gun is used to apply polyurethane expanding foam for sealing gaps, insulating cavities, and preventing air leakage.
The correct process involves:
-
Preparing and masking the surface
-
Shaking and attaching the foam canister
-
Testing the spray pattern
-
Applying foam in 50–60% layers
-
Allowing 45–90 minutes before trimming
-
Cleaning the gun immediately after use
Proper use improves insulation efficiency and prevents foam gun clogging.

What Is a Spray Foam Gun?
A spray foam gun is a controlled applicator that connects to a pressurized polyurethane foam canister.
Compared to straw applicators, spray foam guns offer:
-
Adjustable foam flow
-
Precise application
-
Reduced material waste
-
Higher durability for repeated use

Typical Performance Characteristics
| Feature | Typical Value |
|---|---|
| Foam expansion rate | 2× – 3× liquid volume |
| Optimal spraying distance | 20–30 cm |
| Ideal temperature range | 15–30°C |
| Surface dry time | 5–15 minutes |
| Trim-ready time | 45–90 minutes |
| Full cure | 24 hours |
These values are commonly referenced by manufacturers and building insulation guidelines.
Required Tools and Safety Equipment
Before opening a spray foam canister, prepare the following materials.
Equipment Checklist
-
Spray foam gun with flow adjustment
-
Polyurethane foam canister
-
Replacement spray nozzles
-
Acetone or gun cleaning solution
-
Masking tape
-
Drop cloths or plastic sheeting
-
Utility knife or foam saw
Safety Gear
-
Nitrile gloves
-
Safety goggles
-
Respirator mask (recommended indoors)
-
Protective clothing
Expanding foam bonds strongly to skin and surfaces within seconds. Always wear gloves.
Step-by-Step Guide to Using a Spray Foam Gun
Step 1 : Prepare the Surface
Foam adhesion depends heavily on surface preparation.
Preparation checklist:
-
Remove dust and debris
-
Ensure the surface is dry
-
Protect nearby areas with plastic sheets
-
Mask surfaces within 30 cm (12 inches)
Professional installers often lightly mist porous surfaces such as concrete or brick because polyurethane foam cures through a moisture-activated chemical reaction.
Step 2 : Shake and Attach the Foam Canister
Polyurethane chemicals separate during storage.

Preparation steps:
-
Shake the canister vigorously for 60 seconds
-
Attach the canister to the gun coupler
-
Install the desired spray nozzle
-
Set flow control to the lowest setting
This ensures consistent foam density and expansion.
Step 3 : Perform a Test Spray
Before spraying the actual surface:
Test the gun on:
-
Cardboard
-
Scrap wood
-
Plastic sheet
Check for:
-
Consistent foam output
-
Correct spray pattern
-
Proper flow control
Adjust the flow dial if necessary.
Step 4 : Apply Foam in Even Passes
Correct spraying technique ensures uniform insulation.

Recommended Application Method
| Parameter | Recommended Value |
| Distance from surface | 20–30 cm |
| Pass overlap | 30–40% |
| Initial fill depth | 50–60% |
| Layer curing delay | 10–15 minutes |
Spray foam expands significantly during curing, which is why cavities should never be filled completely in one pass.
Environmental Conditions for Spray Foam
Temperature significantly affects foam performance.
| Temperature | Result |
| Below 10°C | Poor expansion |
| 15–30°C | Optimal performance |
| Above 35°C | Foam cures too quickly |
Store foam canisters at room temperature before use.
Spray Foam Curing Timeline
| Stage | Time | Action |
| Surface dry | 5–15 min | Leave untouched |
| Trim ready | 45–90 min | Cut excess foam |
| Paint ready | 8–12 hours | Apply coatings |
| Full cure | 24 hours | Structural stability |
Disturbing foam before full curing can weaken insulation performance.
Step 5 : Trim Excess Foam
After curing, excess foam can be trimmed using:
-
Utility knife
-
Handsaw
-
Foam cutting saw
Best practice:
-
Score lightly along the surface
-
Make multiple shallow cuts
-
Trim flush with the surrounding material
Sanding the surface with 80-grit sandpaper improves paint adhesion.
Step 6 : Clean the Spray Foam Gun
Cleaning is the most important step for preserving the tool.
Polyurethane foam begins curing inside the gun within 5–8 minutes.

Cleaning Process
-
Remove the foam canister
-
Dispense remaining foam onto scrap material
-
Attach acetone or cleaning cartridge
-
Flush until clear solvent exits the nozzle
-
Wipe external surfaces
Cleaning typically takes under 3 minutes.
Skipping this step may permanently block the gun.
Common Spray Foam Gun Mistakes
1. Not Shaking the Canister
Foam chemicals separate during storage.
Solution: Shake for 60 seconds before use.
2. Spraying Too Close
Holding the nozzle under 10 cm creates uneven foam buildup.
Solution: Maintain 20–30 cm spraying distance.
3. Overfilling Cavities
Foam expands significantly during curing.
Solution: Fill cavities only halfway initially.
4. Skipping Surface Cleaning
Dust and oil reduce adhesion.
Solution: Clean surfaces before spraying.
5. Delaying Gun Cleaning
Foam can harden inside the gun within 15–30 minutes.
Solution: Clean immediately after finishing.
Expert Summary
Correct spray foam gun usage depends on three habits:
-
Prepare surfaces properly
-
Apply foam in controlled layers
-
Clean the gun immediately
Following these practices results in:
-
Better insulation performance
-
Lower material waste
-
Longer tool lifespan
Frequently Asked Questions
How far should a spray foam gun be held from the surface?
The recommended distance is 20–30 cm (8–12 inches) to ensure even foam distribution.
Can spray foam guns fill small cracks?
Yes. Using a narrow nozzle with low flow control allows precise application in small gaps.
How long does spray foam take to cure?
Typical curing times:
-
Surface dry: 5–15 minutes
-
Trim ready: 45–90 minutes
-
Full cure: 24 hours
What happens if a spray foam gun is not cleaned?
Foam may harden inside the gun barrel within 15–30 minutes, permanently clogging it.
Are spray foam nozzles reusable?
Most nozzles are designed for single use, although immediate cleaning may allow 2–3 uses.
Compartir este


Autor: Krakenbond
Found this helpful? Make Kraken Bond your go-to source on Google
If our content has been useful, you can tell Google to show more of it when you search. Click below, then check the box next to "KrakenBond.net" on the page that opens. It takes about five seconds.
Add Kraken Bond on GoogleYou'll need to be signed in to your Google account. One click, then tick the box next to KrakenBond.net
Let customers speak for us

Does not go near as far as described if you want any thickness but it does work real well. Easy to use. Price is still worth it compared to Menards brand. Looks great. Could use more than 1 cleaner can if not using it all at the same time.
Product sprayed well with good coverage. I was very happy with me the results. I had purchased another brand and it didn’t spray very well and the coverage was not great compared to Kraken.

Great product
Haven’t used it yet. But been reading instructions and seems easy enough. We will see.
It was delivered in a reasonable amount of time and packaging was great.
Was easier to apply than I thought. Cleaning was very easy with the added cleaner cans.
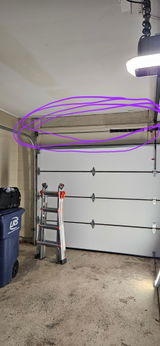
Used this to insulate the space between the ceiling and the wall right above a two-car garage door. It worked exactly as described, and I was surprised how easy it was! It took more time to move the ladder around and get stuff out of the way in the garage than it did to actually spray. Tips: Shake the can longer than 2 minutes. The better you shake the better the product comes out. Clean the nozzle and gun with the cleaner frequently and don't let it sit between cans. An actual respirator is highly recommended! Wear all the protective gear it comes with, especially the glasses. Take frequent open air breaks as you go. Overall I am impressed for a product I bought from a Facebook ad.
Kit is great, has everything you need!

The best pond foam out there, just order another case.
Incredible quality and very easy to use. I highly recommend this product.

The quality of the product is very good, the sealant stays white after drying out.
Great product, easy to use

The quality of this foam gun is excellent. The design is well refined and fits in the hand extremely well. The trigger works phenomenally. After several jobs this gun continues to impress.

Best caulk ove used in years. 144 tubes used so far and after 3 years it is solid and reliable.
Foam was easy to use and insulated the duct pipe well. Odor dissipated faster than expected.
It works great didn’t go as far as I thought


Dejar un comentario