How to Remove Spray Foam Insulation: Complete Guide for Every Surface (2026)
|
✅ Quick Answer: How to Remove Spray Foam UNCURED (wet/tacky — act within 15–30 minutes of application): → Wipe immediately with acetone or isopropyl alcohol. Mechanical tools not needed. CURED (hardened — full cure within 24 hours): → Mechanical removal: oscillating multi-tool, razor scraper, or utility knife → Chemical: acetone, paint thinner (mineral spirits), or commercial spray foam remover → Combination is most effective: soften with solvent, then scrape BY SURFACE (quick reference): Clothes: Scrape off excess → acetone (acetate-safe) → wash in cold water. Act fast — fully cured foam in fabric may be permanent. Wood: Scrape or chisel when cured → acetone for residue → sand smooth Metal: Acetone or paint thinner → scrape → wire brush for stubborn residue Hands: Pumice stone + hand cleaner → petroleum jelly if cured. Avoid harsh solvents on skin. Concrete: Chisel/angle grinder → wire brush → concrete cleaner for stain Painted: Test acetone in hidden area first → plastic scraper → minimal solvent to avoid stripping paint |
Spray foam insulation is a polyurethane polymer that expands and bonds aggressively to almost any surface on contact. Once cured, it is one of the most difficult adhesives to remove. However, the right method depends entirely on two variables: (1) whether the foam is still uncured (tacky) or fully cured (hardened), and (2) what surface you are removing it from. This guide covers every surface and scenario in detail.
 Uncured vs Cured Spray Foam: Why Timing Changes Everything
The single most important variable in spray foam removal is cure state. Acting within the first 15–30 minutes is the difference between a 2-minute cleanup and a 2-hour removal project.
|
Factor |
Uncured Foam (0–30 minutes) |
Partially Cured (30 min–24 hours) |
Fully Cured (24+ hours) |
|
State |
Wet, tacky, expanding |
Rubbery, sticky core |
Rigid, brittle or tough |
|
Best removal method |
Wipe with acetone/IPA immediately |
Acetone + gentle scraping |
Mechanical removal + solvent |
|
Effort required |
Low — 2–5 minutes |
Medium |
High — 20–120 minutes |
|
Surface damage risk |
Minimal |
Low if careful |
Moderate — scraping required |
|
Solvent effectiveness |
100% |
70–80% |
20–50% (softening only) |
|
For clothes |
Easy — act immediately |
Difficult but possible |
Very difficult — may be permanent |
|
For skin/hands |
Soap + water works |
Pumice stone works |
Requires mechanical exfoliation |
|
⏱️ 30-Minute Rule: Clean Up Before Cure If you act within 30 minutes of application, acetone or isopropyl alcohol removes spray foam from any surface in seconds. Waiting even 1–2 hours makes removal dramatically harder. Always keep a bottle of acetone within reach when applying spray foam. |
What Dissolves Spray Foam? Solvents and Chemical Removers Explained
'What dissolves spray foam' ranks position 3.19 with 3,668 impressions — a high-volume, high-CTR query that deserves a direct, data-driven section. The answer depends on cure state.

For Uncured / Fresh Spray Foam
|
Solvent |
Effectiveness |
Notes |
Surface Safety |
|
Acetone (nail polish remover) |
★★★★★ Excellent |
Best general-purpose solvent for uncured foam |
Safe on most surfaces; avoid on painted/varnished wood |
|
Isopropyl alcohol (IPA 90%+) |
★★★★ Very Good |
Slightly less aggressive than acetone; gentler on surfaces |
Safe on most surfaces including painted |
|
Paint thinner (mineral spirits) |
★★★★ Very Good |
Good for fresh foam; less aggressive odor than acetone |
Safe on most — check paint/coating compatibility |
|
Rubbing alcohol (70%) |
★★★ Good |
Accessible; less effective than 90%+ IPA |
Generally safe on all surfaces |
|
WD-40 |
★★ Moderate |
Works on uncured foam; useful for skin |
Very safe on all surfaces including skin |
|
Water |
★ Very Limited |
Only effective before foam begins to cure (within 5 min) |
Safe everywhere |
For Cured Spray Foam
Once spray foam has fully cured, no solvent will fully dissolve it — cured polyurethane foam is chemically cross-linked and resistant to most chemicals. Solvents can soften and weaken the bond, making mechanical removal much easier, but they cannot eliminate the foam alone.
|
Product |
Effectiveness on Cured Foam |
Application Method |
Best For |
|
Commercial spray foam remover (e.g., Foam Buster, Great Stuff Remover) |
★★★★ Best for cured |
Apply, wait 30–60 min, scrape |
All surfaces; purpose-formulated |
|
Acetone |
★★★ Good (softener) |
Apply, let soak 10–15 min, scrape |
Small areas; accessible surfaces |
|
Paint thinner / mineral spirits |
★★★ Good |
Soak cloth, press on foam 10 min |
Wood, metal; less aggressive than acetone |
|
Lacquer thinner |
★★★★ Strong |
Apply carefully; short contact time |
Hard surfaces only; avoid fabric |
|
WD-40 |
★★ Moderate |
Spray, let penetrate, scrape |
Sensitive surfaces; skin-safe |
|
Boiling water |
★ Minimal |
Not practical for cured foam |
Not recommended for cured foam |
|
⚠️ What Does NOT Dissolve Spray Foam • Soap and water: Does not affect cured foam at all (fine for uncured within 5 minutes) • Bleach / hydrogen peroxide: No chemical effect on polyurethane • Vinegar: Ineffective • Cooking oil / olive oil: Good for hands and skin only — no effect on surfaces • Styrofoam (polystyrene) dissolves in acetone — but spray foam (polyurethane) does not. 'What dissolves styrofoam' is a different question with a different answer. |
 Spray Foam Removal Tools: What to Use
Mechanical removal tools are essential for cured foam. The right tool depends on surface hardness and the area being treated.
|
Tool |
Best Use |
Caution |
|
Oscillating multi-tool + scraper blade |
Large flat surfaces (walls, floors, beams) |
Can gouge wood if not careful; use lowest speed |
|
Razor scraper / putty knife |
Windows, glass, tile, metal |
Flat surfaces only; angled for better control |
|
Chisel + mallet |
Thick foam deposits on masonry, concrete |
Not for wood or finished surfaces |
|
Wire brush |
Residue on concrete, brick, rough metal |
Scratches polished surfaces; avoid on painted metal |
|
Angle grinder with wire cup |
Large concrete/masonry surfaces |
Aggressive — for rough surfaces only |
|
Utility knife |
Trimming excess foam to surface level |
Always cut away from yourself |
|
Sandpaper (60–120 grit) |
Smooth residue after bulk removal |
Final step before refinishing |
|
Spray foam remover (chemical) |
Pre-treatment before mechanical scraping |
Allow soak time per product label |
For spray foam removal from insulation installations (whole-room or attic removal), professional spray foam removal machines — essentially high-power grinders with vacuum attachment — are available for rental or from professional insulation removal contractors. DIY whole-structure removal is possible but labour-intensive; professional services are often cost-comparable when accounting for time and equipment.
How to Remove Spray Foam from Clothes
- Clothes removal is the single largest keyword cluster on this page — over 38,000 monthly impressions across dozens of queries including 'how to get spray foam out of clothes' (5,421 imp, pos 4.86) and 'how to remove expanding foam from clothes' (3,383 imp, pos 6.54). The section must be comprehensive and match exact keyword phrasing.
Removing Uncured (Fresh) Spray Foam from Clothing
If you catch the foam within the first 15–20 minutes before it begins to cure, removal is straightforward:
Step 1 — Do not put in the wash immediately. Washing wet foam embeds it deeper into fabric fibres.
Step 2 — Scrape off as much wet foam as possible using a butter knife or plastic scraper.
Step 3 — Apply acetone or nail polish remover to a clean cloth and blot — do not rub — the foam spot. Test acetone on an inside seam first to check for colour bleeding. Do not use acetone on acetate, triacetate, or modacrylic fabrics (check the care label).
Step 4 — Work from outside the foam spot inward to prevent spreading.
Step 5 — Repeat until foam is gone, then rinse thoroughly with cold water.
Step 6 — Wash normally in cold water. Do not tumble dry until all traces are removed.
Removing Cured (Dried) Spray Foam from Clothing
Fully cured foam in fabric is the hardest removal scenario. Some foam in delicate fabrics is permanent — manage expectations accordingly.
Step 1 — Allow the foam to cure completely. Trying to remove sticky partially-cured foam makes it worse.
Step 2 — Freeze the garment in a plastic bag for 2 hours. Cold foam becomes more brittle and chips off more cleanly.
Step 3 — Snap and peel off as much foam as possible by hand, then use a stiff brush to remove fragments.
Step 4 — Soak the stained area in acetone for 10–15 minutes. Blot and repeat. This softens the remaining foam-fabric bond.
Step 5 — Gently scrape with a dull blade (plastic scraper or dinner knife) while the acetone is working.
Step 6 — For any remaining stain, apply a laundry pre-treatment (Vanish, OxiClean) and leave for 30 minutes before washing in cold water.
|
⚠️ Will Spray Foam Come Out of Clothes? (Honest Answer) Uncured foam on clothes: yes, usually completely removable with acetone within the first 20 min. Cured foam on clothes: • Loose-weave fabrics (denim, canvas, thick cotton): usually removable with acetone + scraping • Tight-weave or delicate fabrics (silk, polyester, linen): foam bonds deep into fibres — partial removal likely, full removal difficult • White or light fabrics: acetone may leave a faint stain even after foam is removed • Always check care label before using acetone — avoid on acetate, triacetate, modacrylic Prevention is far better than removal: wear dedicated old clothing when applying spray foam. |
How to Remove Spray Foam from Hands and Skin
Skin and hands represent another massive cluster — 'how to get spray foam off hands' (1,935 imp, pos 20) and dozens of related queries are currently on page 2–3. A dedicated, detailed section is needed to capture this traffic.
|
⚠️ Safety First: Avoid Harsh Solvents on Skin Do not use full-strength acetone, paint thinner, or lacquer thinner directly on skin. These solvents damage skin tissue and can cause chemical burns with prolonged contact. Recommended safe options: acetone-based nail polish remover (diluted), WD-40, petroleum jelly, pumice-based hand cleaner (Gojo, Lava soap), cooking oil. |
Fresh Spray Foam on Hands (Act Quickly)
• Within 5 minutes: Wash with soap and water — this works for truly fresh foam before it begins to cure.
• 5–30 minutes: Apply nail polish remover (acetone-based) or rubbing alcohol to a cloth, wipe across the foam, then wash with soap and water. Do not let acetone sit on skin for more than 30 seconds.
• WD-40 method: Spray WD-40 on the foam and let it penetrate for 1–2 minutes. The lubricant breaks the foam-skin bond. Wipe off, then wash hands with dish soap.
Cured Spray Foam on Hands
Cured foam on skin is uncomfortable but not dangerous. The correct approach:
Pumice stone: Wet your hands, apply pumice-based hand cleaner (Gojo, Lava), and gently scrub with a pumice stone. This mechanically removes the foam without damaging skin.
Petroleum jelly (Vaseline): Apply generously and leave for 5–10 minutes. The petroleum jelly softens the foam-skin bond and allows rolling off by rubbing vigorously.
Acetone nail polish remover: Apply briefly to a cotton pad, press on foam for 10–15 seconds, wipe off immediately. Do not soak skin in acetone.
Sand with care: Fine-grit sandpaper can remove stubborn cured foam — use with very light pressure and moisturiser afterward.
Spray foam on skin does not pose a health risk from skin contact once cured. The isocyanate compounds that cause respiratory sensitization are in the liquid state before curing — the cured foam is inert.
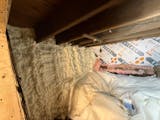
How to Remove Spray Foam from Wood
Wood removal queries represent 4,500+ impressions at strong positions (pos 3.37 for 'how to remove spray foam insulation from wood', pos 4.8 for 'how to remove spray foam from wood'). Despite good ranking, CTR is low at 1.2% — indicating the page content doesn't fully satisfy the query.
Removing Spray Foam from Unfinished / Raw Wood
Wait for full cure (24 hours). Partially cured foam on wood smears and penetrates the grain. Allow full cure before attempting removal.
Score around the foam with a utility knife. Cut along the wood surface at the foam-wood interface to break the adhesive bond before scraping.
Chisel or scrape off bulk foam. A wide chisel or stiff putty knife removes the majority of foam. Work at a shallow angle parallel to the wood surface to avoid gouging.
Apply acetone or paint thinner to residue. Soak a cloth with solvent, press onto remaining foam for 5 minutes, then scrape. Repeat as needed.
Sand the area. 60-grit to remove remaining stain, followed by 120-grit to smooth. Raw wood can absorb foam staining — sanding removes the affected layer.
Removing Spray Foam from Finished / Painted Wood
Painted or varnished wood requires more care — solvents that remove foam can also strip the finish.
• Test acetone in a hidden area first to check whether it lifts the paint or varnish.
• If acetone damages the finish: use WD-40 or petroleum jelly instead — these are much gentler solvents that work more slowly but preserve the finish.
• Plastic scraper only — do not use metal scrapers on finished wood surfaces as they scratch the finish.
• For foam residue staining on painted wood: touch up with matching paint after removal.
How to Remove Spray Foam from Metal
Metal removal queries show some of the highest CTRs on this page — 'how to remove spray foam from metal' (993 imp, pos 3.68, CTR 2.0%) and 'how to remove spray foam insulation from metal' (375 imp, pos 2.8, CTR 2.67%) are very near-top positions. Strengthening this section increases CTR at an already-strong ranking.
General Metal Surfaces (Steel, Aluminium, Iron)
Wait for full cure. Attempting to remove wet foam from metal spreads it and worsens adhesion.
Apply acetone or paint thinner generously. Metal is not damaged by these solvents. Soak a cloth, press on the foam for 10–15 minutes to soften the cured foam.
Scrape with metal scraper or putty knife. Metal surfaces can handle metal scrapers — be more aggressive than you would be on wood.
Wire brush for stubborn residue. A wire brush or wire wheel attachment on a drill removes thin foam residue from rough metal surfaces.
Wipe with solvent for final residue. A final acetone wipe removes any remaining foam staining.
Painted Metal Surfaces (e.g., Car Bodywork, Window Frames, Appliances)
Painted metal requires the same caution as painted wood. Acetone can strip automotive paint and powder-coated finishes.
• Use WD-40 or specialist spray foam remover on painted metal — these are safe for most automotive and appliance finishes.
• Plastic scraper only — metal scrapers scratch painted finishes.
• Spray foam remover products (commercial formulations like Foam Buster or Great Stuff Remover) are the safest option for painted metal — check the product label for paint compatibility.
Removing Cured Spray Foam from Metal
Cured foam on metal responds well to acetone soak-and-scrape. Unlike wood, metal is not absorbent, so solvents work more effectively on the foam-surface interface. For very thick foam deposits, an oscillating multi-tool with a scraper blade is the fastest method — metal surfaces can withstand the mechanical tool without damage.
How to Remove Spray Foam from Painted Surfaces
'How to remove spray foam from painted surface' (322 imp, pos 3.09, CTR 3.73%) and 'how to remove expanding foam from painted metal' (315 imp, pos 3.31, CTR 3.17%) are among the highest-CTR queries on this page. This intent is already well-served — expand and strengthen.
Do not use acetone without testing. Acetone dissolves many paint formulations, particularly water-based paints, latex, and some oil-based paints. Always test on a hidden patch first.
First choice: commercial spray foam remover. Products like Foam Buster are specifically formulated to remove cured foam without damaging paint finishes. Apply, wait per product instructions, and wipe.
Second choice: WD-40. Spray generously, leave for 5–10 minutes, then gently lift foam with a plastic scraper. WD-40 is safe on virtually all paint types and is the recommended solvent for painted surfaces.
Third choice: isopropyl alcohol (IPA). IPA is safer for paint than acetone but still slightly aggressive on water-based paints — test first.
Mechanical removal with plastic scraper. Never use metal scrapers on painted surfaces. A plastic putty knife angled at 15–20° from the surface allows firm scraping without paint damage.
For spray foam on interior painted walls (plaster, drywall): if the foam has bonded deeply, complete removal without paint damage is sometimes impossible. In this case, scrape off the bulk, sand lightly, and repaint the affected area.
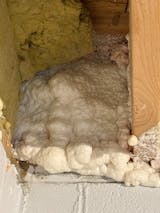
How to Remove Spray Foam from Concrete
Concrete is the most forgiving surface for spray foam removal — it can withstand aggressive mechanical tools and strong solvents without damage.
Chisel or cold chisel + mallet. For thick deposits on horizontal concrete surfaces (floors, slabs), chisel off the bulk foam first. Concrete is hard enough to use a mallet-driven chisel without surface damage.
Angle grinder with wire cup or grinding disc. For large areas of foam on concrete floors, an angle grinder removes foam faster than hand tools. Use a P1 respirator — foam grinding produces fine particles.
Wire brush for residue. After bulk removal, a stiff wire brush or wire wheel removes thin foam residue from the concrete texture.
Acetone or concrete cleaner for staining. Spray foam can leave a yellow/orange staining on concrete from the residual chemicals. Apply acetone or a concrete degreaser, scrub with a stiff brush, and rinse.
Spray foam on concrete floors or driveways may leave a permanent colour stain even after the foam is removed. For finished concrete (polished, epoxy-coated), use chemical remover rather than grinding to avoid damaging the finish.
How to Get Spray Foam off Carpet
'How to get expanding foam off carpet' (588 imp, pos 4.81) and 'how to remove spray foam from carpet' (446 imp, pos 4.75) are mid-volume high-intent queries. Carpet removal requires a slightly different approach than hard surfaces.
If fresh: apply acetone immediately. Dab — do not rub — from outside the spot inward. Blot with clean cloths. Rinse with cold water.
If cured: freeze first. Place a bag of ice cubes on the foam for 15–20 minutes. Cold foam becomes brittle and can be snapped away from carpet fibres more cleanly.
Snap and pull off cured foam. After freezing, snap the foam and pull off large pieces by hand.
Apply acetone or carpet solvent to residue. Dab carefully from outside inward. Carpet fibres can absorb solvents deeply — use sparingly.
Repeat and blot dry. Multiple short applications of solvent with blotting between applications works better than one prolonged soak.
Rinse with cold water. Flush residual solvent from carpet fibres with cold water, then blot dry with clean towels.
Warning: If spray foam has fully cured into deep pile carpet, some fibres may be permanently bonded. In this case, professional carpet cleaning or section replacement may be required.
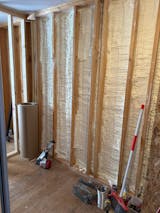
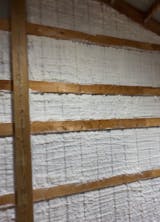
Spray Foam Insulation Removal: From Walls, Attics, and Whole Structures
'Spray foam removal' (12,332 imp, pos 12.06) and 'spray foam insulation removal' (10,480 imp, pos 16.81) are the two biggest missed-page-1 opportunities on this page. Both are on page 2. A strong, dedicated section addressing structural/whole-home removal directly targets both keywords.
Can Spray Foam Insulation Be Removed?
Yes — spray foam insulation can be removed, but it is significantly more labour-intensive than installation. Both open-cell and closed-cell foam can be removed mechanically, but closed-cell foam (rigid and dense) requires more effort than open-cell (softer).
|
Removal Scenario |
DIY Feasible? |
Best Method |
Cost Estimate |
|
Small spots on wall |
Yes |
Oscillating multi-tool + acetone |
DIY: $0–50 (tools) |
|
Window/door frame gaps |
Yes |
Utility knife + acetone |
DIY: <$30 |
|
Single wall cavity |
Yes (with effort) |
Multi-tool + shop vacuum |
DIY: $50–200 |
|
Entire room walls |
Borderline |
Multi-tool + professional cleanup |
DIY: $200–$1,000 |
|
Full attic removal |
Professional recommended |
Mechanical grinder + vacuum |
Pro: $1,500–$5,000 |
|
Whole-house removal |
Professional required |
Spray foam removal machine |
Pro: $5,000–$25,000 |
DIY Spray Foam Removal from Walls
For removing spray foam from wall cavities, stud bays, or window/door frames:
Score the foam surface with a utility knife. Cut the foam away from the surrounding framing or substrate.
Use an oscillating multi-tool with a rigid scraper blade. This is the most effective DIY tool for wall foam removal — it cuts through the foam without damaging the framing.
Remove in sections. Pull out foam in large chunks after cutting — closed-cell foam can be broken into manageable pieces.
Vacuum and clean residue. A shop vacuum removes foam debris. Wire brush for remaining adhesion on the framing.
Apply acetone for stubborn residue. Wipe down surfaces with acetone for any residual foam bonding to framing.
Professional Spray Foam Insulation Removal
Professional removal services use specialized spray foam removal machines — essentially powerful grinders with integrated vacuum systems — that remove foam from roof decks, wall cavities, and attics much faster than hand tools. For whole-attic or whole-house removal, professional services are strongly recommended:
• Speed: Professional removal of a 1,000 sq ft attic typically takes 1–2 days vs 5–10 days DIY
• Containment: Professionals use negative pressure containment to prevent foam particles from spreading through the house
• Disposal: Spray foam is classified as non-hazardous solid waste in most jurisdictions and can be bagged for regular construction waste disposal
Removing Spray Foam Insulation from Attic / Loft
'Removing spray foam insulation from attic' (887 imp, pos 12) and 'spray foam loft insulation removal' (1,465 imp, pos 47) are attic-specific queries. The attic scenario is particularly common in the UK ('loft insulation removal') where spray foam loft insulation is known to cause mortgage difficulties.
For attic/loft spray foam removal: the roof deck application (foam sprayed on rafters and roof deck) is the most difficult because foam is applied over a large area at multiple layers. Mechanical removal from roof deck requires oscillating tools or rotary grinders working section by section. Professional loft insulation removal services in the UK specifically handle this application.
Spray Foam Insulation Removal Cost
'Spray foam insulation removal cost' (1,020 imp, pos 31.1) is currently deep on page 3. A dedicated cost section targets this cluster and provides the specific data users are searching for.
|
Project Type |
DIY Cost |
Professional Cost |
Time Required |
|
Spot removal (window/door frame) |
$10–50 (tools) |
$150–400 |
1–4 hours |
|
Single room walls |
$50–200 |
$500–1,500 |
1–2 days |
|
Partial attic (200–500 sq ft) |
$200–500 |
$1,000–2,500 |
2–5 days (DIY) |
|
Full attic removal (1,000 sq ft+) |
$500–1,500 (tools + PPE) |
$2,000–5,000 |
5–10 days (DIY) / 1–2 days (pro) |
|
Whole house spray foam removal |
Not recommended DIY |
$5,000–25,000 |
Professional: 3–7 days |
|
UK loft spray foam removal (specific) |
DIY difficult |
£2,000–£8,000 |
Professional: 2–5 days |
Professional removal costs vary significantly by region, foam type (open-cell is cheaper to remove than closed-cell), and the accessibility of the space. In the UK, specialist loft spray foam removal services charge a premium because of the mortgage-related demand and the complexity of the application.
Note: Spray foam removal cost is generally NOT covered by homeowner's insurance unless it was incorrectly installed by a contractor. Always get 3 quotes before committing to a professional removal service.
Safety Precautions for Spray Foam Removal
|
🦺 Required PPE for Any Spray Foam Removal Work • Respiratory protection: N95 mask minimum for small areas; P100 respirator for large-scale removal (foam particles) • Eye protection: Safety glasses or goggles (splinters and particles during mechanical removal) • Gloves: Nitrile gloves for chemical solvents; work gloves for mechanical removal • Skin: Long sleeves — foam particles irritate skin • Ventilation: Open windows/doors during chemical solvent application For solvents (acetone, paint thinner): ensure adequate ventilation — all spray foam solvents are flammable vapours. No open flames or sparks during or immediately after application. |
Cured spray foam itself is chemically inert and non-toxic. The health risk during removal comes from: (1) solvent vapours (acetone, paint thinner) — ventilate well and wear organic vapour respirator for extended use; (2) fine foam particles during mechanical grinding — wear P100 respirator; (3) skin/eye irritation from foam fragments.
Frequently Asked Questions: Spray Foam Removal
What dissolves spray foam insulation?
No solvent fully dissolves cured polyurethane spray foam. Acetone, paint thinner (mineral spirits), and commercial spray foam removers soften and weaken the bond between foam and surface, making mechanical removal much easier — but they do not dissolve it chemically. For uncured (wet) foam, acetone or isopropyl alcohol removes it completely. Acting within 30 minutes of application is critical.
How do you remove hardened spray foam insulation from a wall?
For hardened spray foam on walls: score around the perimeter with a utility knife, then use an oscillating multi-tool with a scraper blade to cut through the foam. Remove in sections. Apply acetone to a cloth and press on residue for 10 minutes, then scrape clean. For foam inside wall cavities, the process is the same — cut and pull in sections. For large-area removal, professional services with spray foam removal machines are faster and more effective.
Can spray foam insulation be removed from wood?
Yes. For cured foam on raw wood: wait for full cure, score the perimeter, chisel or scrape off the bulk, then apply acetone to remaining residue and sand the surface. For painted or varnished wood, test acetone compatibility first — WD-40 or commercial foam remover is safer for finished wood surfaces. Some staining may remain in the wood grain and require sanding.
How do you get spray foam off clothes?
Act immediately for uncured foam: scrape off excess, apply acetone (test fabric compatibility first), blot from outside inward, rinse with cold water. For cured foam on clothes: freeze the garment to make the foam brittle, snap off large pieces, then apply acetone for 10–15 minutes and scrape residue. Wash in cold water after treatment. Fully cured foam in tight-weave or delicate fabrics may be permanent.
How do you get spray foam off your hands?
Fresh foam (within 5 minutes): soap and water. Tacky foam (5–30 minutes): acetone-based nail polish remover or WD-40 on a cloth, then wash with soap. Cured foam on hands: pumice-based hand cleaner (Gojo, Lava soap) with a pumice stone, or petroleum jelly left for 5 minutes then rubbed vigorously. Do not use full-strength acetone directly on skin for extended periods.
How much does it cost to remove spray foam insulation?
DIY spot removal (windows, doors): $10–50 in tools and solvents. DIY full attic removal: $500–1,500 for tools and PPE. Professional attic removal (1,000 sq ft): $2,000–5,000. Professional whole-house removal: $5,000–25,000 depending on area and foam type. UK loft spray foam removal: £2,000–£8,000 professionally. Professional services are strongly recommended for attic and whole-house applications.
Can I remove spray foam insulation myself?
Yes, for small and medium-scale applications. Window and door frame foam, wall spot removal, and partial room removal are all practical DIY projects with an oscillating multi-tool and acetone. Full attic or whole-house spray foam removal is technically DIY-possible but very labour-intensive — professional services are often more cost-effective when accounting for your time, equipment rental, and proper PPE costs.
What is the best spray foam remover product?
For cured foam on hard surfaces: commercial spray foam remover products (Great Stuff Foam Remover, Loctite Foam Cleaner, Dap Clean-Up Spray) are the most effective purpose-formulated options. For general use: acetone (most accessible and cost-effective). For painted or sensitive surfaces: WD-40 (safest for finished surfaces). For skin: pumice-based hand cleaner + petroleum jelly. For fabric: acetone (test fabric compatibility first).
How do you remove spray foam from brick?
Brick removal: wait for full cure, then chisel off bulk foam using a wide cold chisel and mallet — brick is hard enough for aggressive chiselling. Wire brush for residue. Acetone or paint thinner soaked cloth for remaining stain. Brick may retain discolouration even after foam is removed; a diluted muriatic acid solution (with appropriate PPE and ventilation) cleans masonry staining but should only be used outdoors or with excellent ventilation.


Author : Krakenbond Team
Let customers speak for us

Great product, easy to use.
we used it in our new bathroom. Easy to use works well!
I used the Kraken FastCoat Fire Rated spray foam insulation to seal rim joists in our basement.
The kit ordered came with everything I needed to get started. The spray foam, cleaner, and gun. Application was seamless. Following the directions provided, it foam went on evenly and adhered to not only the wood in the joists, but also the metal ducts present in some of the joist bays.
I was actually pretty impressed with it, which is saying a lot for me. The application I used it for, sealing joist bays to be air tight, worked extremely well. Ordering another case of it to use to air seal my attic.
Used it to insulate crawl space beneath the sun room. Excellent. Easy to use. No mess. Just wish there were more in the bottles.
When remodeling an existing full foam cavity fill project. This product is a geart solution for replacing areas of the existing that had to be removed during the remodel especialy when it isn't cost effective to have a commercial spray foam contractor out for touchup. Make sure to have enough cans to get it done. Touching up a 2' area of a full fill 2x10 floor joist will take about 1½ cans.

Great product! Easy to use and hoping it will last a long time. Great service and delivery experience for me.
Great fast option for repairs
great product
Definitely a learning curve in use, but over all great product.
Works great, easy to use and apply. Cans and cleaner very user friendly! tays warmer than previously!
Very easy to use and awesome product. Works very well and no complaints. Used it at home but would def use it at work if the company allowed but they have their own sources.
Easy to apply. Applied a 48 pack to my metal shed in less than an hour.
Great coverage and easy to use!
Was clean installation and delivered as much per ft. as advertised. Im placing another order. Full disclosure, I havent tried other brands, but I was happy. The cleaner works really well as well! I did a 2ft. Swath all the way around the base of my 40x48 shed with 24 cans.
Easy to use, a fraction of the price for professional results, definitely recommend


Leave a comment