DIY Home Insulation: The Most Practical and Cost-Effective Methods (2026 Guide)
|
✅ Quick Answer: What Is the Cheapest Way to DIY Insulate a House? 1. Air sealing with spray foam cans (gaps, outlets, penetrations): $100–$200 materials, highest ROI 2. Blown-in cellulose in attic: $300–$700 for 1,000 sq ft; rental blower often free with bag purchase 3. Fiberglass batts for walls & crawl space: $0.30–$0.60/sq ft; no special tools 4. Rigid foam boards for basement/rim joists: $0.25–$1.00/sq ft; high R-value per inch Most homeowners save $200–$1,000/year after completing all four steps. |
DIY home insulation is the practice of adding or upgrading thermal barriers in your home without hiring a contractor. The right materials and approach depend on the area being insulated, your climate zone, and budget. When done correctly, DIY insulation reduces heating and cooling costs by 10–50%.
This guide covers every major DIY insulation type, the cheapest methods available, a step-by-step installation process, homemade insulation ideas that actually work (and those that don't), and all the schema-ready FAQs search engines and AI assistants need to surface this content in answers.

What are the Different Types of Home Insulation?
Seven main insulation types are available to DIY homeowners. The right choice depends on the area, your target R-value, and budget.
|
Type |
Best Areas |
DIY Ease |
Material Cost/sq ft |
R-Value/inch |
|
Blown-in / Loose-fill |
Attic, wall cavities |
Easy–Med |
$0.25–$0.50 |
R-2.2 to R-3.8 |
|
Fiberglass Batts |
Walls, floors, ceilings |
Easy |
$0.30–$0.60 |
R-2.9 to R-3.8 |
|
Rolled Insulation |
Attic floors |
Easy |
$0.25–$0.50 |
R-2.9 to R-3.8 |
|
Rigid Foam Board |
Basement, exterior |
Medium |
$0.25–$1.00 |
R-3.8 to R-6.5 |
|
Spray Foam (can/kit) |
Gaps, rim joists, walls |
Easy |
$10–$20/can |
R-3.7 / R-6.2 |
|
Radiant Barrier |
Attic rafters (hot climate) |
Medium |
$0.10–$0.25 |
Reflects radiant heat |
|
Vapor Barrier |
Crawl space, walls |
Easy |
$0.05–$0.30 |
Moisture control |
Blown-In / Loose-Fill Insulation
Blown-in insulation uses cellulose, fiberglass, or mineral wool blown through a hose. R-values range from R-2.2 to R-3.8 per inch. Most home improvement stores provide a free rental blower when you purchase a minimum number of bags—making this the most cost-effective attic insulation method for DIYers. It covers irregular shapes and hard-to-reach areas that batts cannot.
Fiberglass Batts
Pre-cut panels designed for standard 16" or 24" stud and joist spacing. R-values: R-2.9 to R-3.8 standard; up to R-4.3 high-density. No special tools required—a utility knife and staple gun are enough. This is the most beginner-friendly DIY insulation for walls, floors, and ceilings.
Rolled Insulation
Structurally identical to batts but sold in 20–40 ft continuous rolls. Eliminates gaps between sections for marginally better performance. R-values mirror batts (R-2.9 to R-3.8). Best suited for long unobstructed attic joist runs.
Rigid Foam Board
Made from EPS, XPS, or polyisocyanurate—R-3.8 to R-6.5 per inch, the highest of any board product. Ideal where cavity depth is limited: basement walls, exterior sheathing, under-slab. Cut with a utility knife; fasten with adhesive or mechanical fasteners.
Spray Foam Insulation (DIY Cans and Kits)
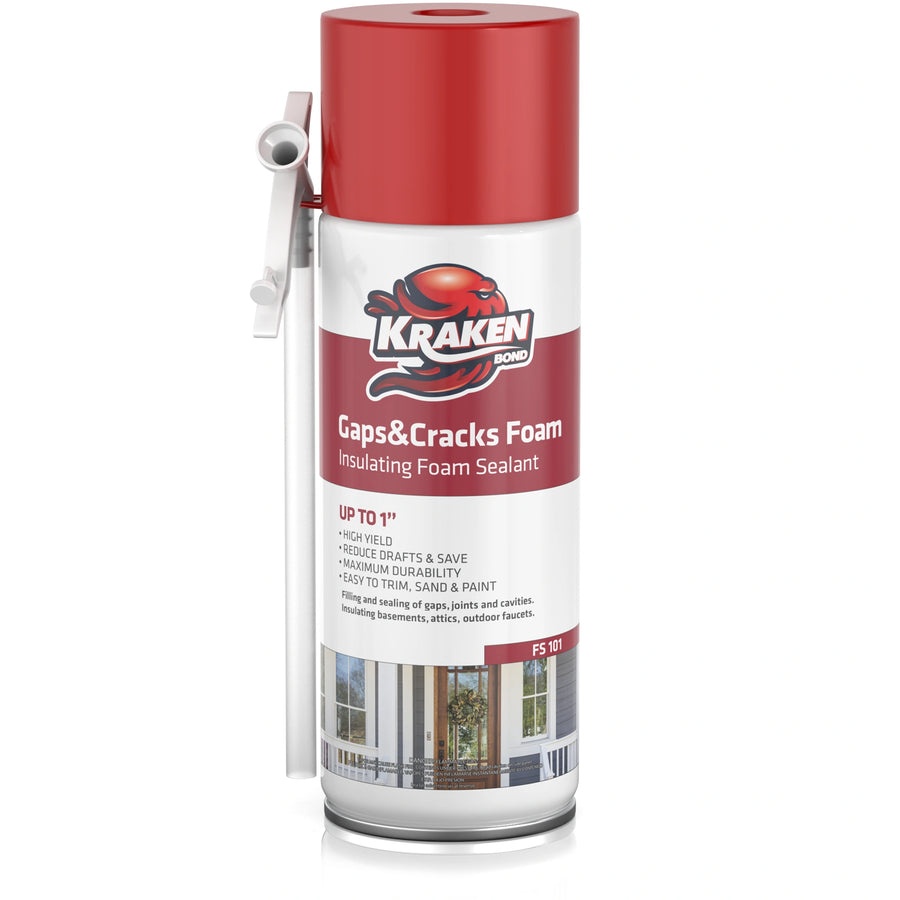
Two-component polyurethane that expands 30–60× to fill voids. Open-cell: ~R-3.7/inch. Closed-cell: ~R-6.2/inch and acts as a vapor barrier. Closed-cell spray foam is the most effective air sealant available to DIY homeowners—the Department of Energy estimates 30–40% of home energy loss comes from air infiltration. Cans handle gaps and cracks; two-component kits cover larger areas like rim joists and crawl space walls.
Radiant Barriers
Reflective aluminum foil that redirects radiant heat rather than slowing conductive heat flow. Most effective in hot climates (attic rafters). Minimal benefit in cold climates where conductive loss dominates. Staple to the underside of rafters—a weekend project for most homeowners.
Vapor Barriers
Polyethylene sheeting or foil-faced kraft paper controls moisture migration through wall and floor assemblies. Critical in cold climates and crawl spaces. Always installed on the warm side of the insulation layer (interior side in heating climates). Required in many building codes for below-grade applications.
Cheapest Ways to Insulate a House (DIY on a Budget)
The cheapest approach to insulate a house is to prioritize the areas with the highest return on investment first. Attic insulation and air sealing consistently deliver the fastest payback because they address the largest energy loss pathways.
|
Priority |
Area |
Method |
Est. Material Cost |
Annual Savings Potential |
|
1 – Highest ROI |
Attic floor |
Blown-in cellulose |
$200–$700 (1,000 sq ft) |
$150–$400 |
|
2 |
All air leaks |
Spray foam cans |
$100–$250 |
$100–$300 |
|
3 |
Crawl space floor |
Fiberglass batts |
$150–$500 |
$100–$250 |
|
4 |
Basement rim joists |
Rigid foam + spray foam |
$100–$300 |
$50–$150 |
|
5 |
Existing exterior walls |
Blown-in dense-pack |
$500–$1,500 |
$100–$300 |
|
💡 Air Seal Before You Insulate (Critical Step Most DIYers Skip) Seal these points with spray foam or caulk before adding any insulation: • Electrical outlets and switches on exterior walls • Plumbing, wire, and duct penetrations through top plates and floors • Attic hatch perimeter and pull-down stair frame • Basement rim joists (between sill plate and first-floor framing) Air sealing alone—costing under $200 in materials—can cut heating/cooling costs by 15–30%. |
How to Insulate Your Attic Yourself: Step-by-Step
This step-by-step guide covers the most common and cost-effective DIY insulation project: adding blown-in insulation to an accessible attic floor. Adapt for other areas as needed.
Materials and Tools Needed: Blown-in cellulose or fiberglass bags · Rental insulation blower · Safety glasses · N95 respirator · Work gloves · Measuring tape · Utility knife · Attic baffles · Recessed light covers · Spray foam cans
Step 1 – Measure and Calculate Your R-Value Target
Measure your attic floor area in square feet. Use the DOE Climate Zone Map to find your recommended R-value (most of the US: R-38 to R-60 for attics). Divide your target R-value by the material's R-value per inch to calculate needed depth. Check the bag coverage chart for the number of bags required.
Step 2 – Seal All Air Leaks First
Before adding insulation, apply fire-rated caulk or two-component spray foam to every penetration in the attic floor: electrical boxes, plumbing stacks, duct chases, and the attic hatch. Skipping this step reduces insulation effectiveness by 20–40%.
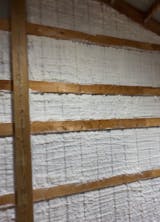
Step 3 – Install Attic Baffles at Each Rafter Bay
Fit cardboard or foam baffles (vent chutes) at each rafter bay along the eaves before adding insulation. Baffles maintain airflow from soffit vents to the ridge vent, preventing moisture buildup and ice dams. Without them, blown-in material blocks soffit vents.
Step 4 – Place Depth Indicator Stakes
Cut 12-inch markers from wire or buy plastic insulation depth rulers. Place one every 50–100 sq ft across the attic floor. These let you check depth accuracy while blowing without stopping the blower.
Step 5 – Cover Recessed Lights
Install fire-rated, airtight covers (IC-rated covers) over any recessed lights in the ceiling below. Direct insulation contact with non-IC-rated fixtures is a fire hazard and code violation in most jurisdictions.
Step 6 – Blow In the Insulation
Connect the blower, load bags, and begin at the farthest corners from the attic access, working backward. Keep the hose tip buried 6–12 inches in the material for best density and coverage. Check your depth stakes regularly to maintain consistent depth.
Step 7 – Insulate the Attic Hatch
Attach rigid foam boards (R-10 minimum) to the back of the attic hatch door and weatherstrip the frame. An uninsulated hatch loses as much heat as a small window.
Homemade Insulation Ideas: What Works and What Doesn't
Homemade insulation ideas are popular because not every homeowner wants to invest in commercial products immediately. Some budget approaches are genuinely effective; others are unsafe or ineffective. Here's an honest breakdown:
Recycled Denim Batts (Legitimate Alternative)
Recycled denim insulation—made from repurposed cotton jeans—installs exactly like fiberglass batts but without skin irritation or the need for a respirator. R-values are comparable (R-3.0 to R-3.8 per inch). It costs 15–20% more than fiberglass, but it's a genuine eco-friendly alternative sold at major home improvement stores.
Bubble Wrap on Windows (Temporary Only)
Misting a single-pane window and pressing bubble wrap against the glass creates an air gap that adds approximately R-1 of insulation. It's a legitimate short-term cold-weather solution, not a replacement for proper weatherstripping or window film. Bubble wrap blocks natural light and should be considered a temporary measure only.
Thermal Curtains and Door Draft Stoppers (Best Quick Win)
Heavy thermal curtains with insulating liners reduce window heat loss by 25–40%. DIY door draft stoppers (a fabric tube filled with sand or rice) can eliminate up to 20% of door air leakage. These are the cheapest insulation upgrades possible—often under $30 per window or door—with no installation beyond hanging.
Reflective Foil Between Attic Rafters
Stapling aluminum foil-faced bubble wrap (reflective insulation) between attic rafters creates a radiant barrier. Effective in hot climates where summer solar gain through the roof is the dominant heat load. In cold climates, it offers minimal benefit because radiant heat is not the primary loss mechanism.
|
⚠️ Homemade Insulation Ideas That Don't Work (And Are Potentially Dangerous) • Newspaper or cardboard stuffed in walls: mold risk, fire hazard, negligible R-value — avoid • Cotton towels or rags in gaps: attracts moisture and pests, compresses over time • Straw bales in standard construction: structural and moisture complications outside specialty builds Always use ASTM-rated materials for permanent insulation — local building codes require it. |
How to Determine the Right R-Value for Your Home?
R-value measures thermal resistance per inch of thickness. The higher the R-value, the better the insulation performs. The Department of Energy's Climate Zone recommendations:
|
Climate Zone |
Example States |
Attic R-Value |
Wall R-Value |
Crawl Space R-Value |
|
Zone 1–2 (Hot) |
FL, HI, southern TX |
R-30 to R-49 |
R-13 |
R-13 |
|
Zone 3 (Mixed) |
AZ, GA, northern TX |
R-38 to R-60 |
R-13 to R-20 |
R-19 |
|
Zone 4 (Mixed-Cold) |
MD, VA, KY, CA Bay Area |
R-38 to R-60 |
R-13 to R-20 |
R-25 |
|
Zone 5–6 (Cold) |
NY, IL, OH, CO |
R-49 to R-60 |
R-20 to R-21 |
R-25 to R-30 |
|
Zone 7–8 (Very Cold) |
MN, ND, AK |
R-49 to R-60 |
R-21+ |
R-30+ |
To check your existing insulation: Turn off power to an exterior wall outlet, remove the cover plate, and use a flashlight to inspect. For attics, measure insulation depth against a joist with a ruler. Compare to the R-value chart above to determine how much additional insulation you need. Full DOE R-value recommendations: energy.gov/energysaver/insulation. In the last step, you can check the R-Value Chart for the USA to determine your house's R-value.
DIY Insulation Cost and Payback Period
Realistic material costs and payback estimates for a typical 1,500 sq ft home:
|
Project |
DIY Material Cost |
Pro Cost (installed) |
DIY Savings |
Est. Payback (DIY) |
|
Attic blown-in to R-38 |
$300–$700 |
$1,000–$2,500 |
~$1,800 |
2–5 years |
|
Whole-house air sealing |
$100–$300 |
$500–$1,500 |
~$1,200 |
6–18 months |
|
Crawl space fiberglass batts |
$200–$600 |
$800–$2,000 |
~$1,400 |
1–3 years |
|
Basement rim joists |
$100–$250 |
$400–$1,000 |
~$750 |
1–2 years |
|
Wall cavity blown-in |
$600–$1,500 |
$2,000–$5,000 |
~$3,500 |
5–10 years |
The Most Practical DIY Insulation: Closed-Cell Spray Foam
For DIY homeowners who need a single high-performance product that handles multiple applications, closed-cell spray foam delivers the best combination of thermal resistance, air sealing, and moisture control.
• Highest R-value per inch: R-6.2 vs R-3.7 for open-cell — critical in shallow cavities
• Dual air and vapor barrier: Eliminates the need for a separate vapor barrier product
• Structural reinforcement: Adds rigidity to wall assemblies in older homes
• Mold resistant: Inert polymer — no organic content to support mold growth
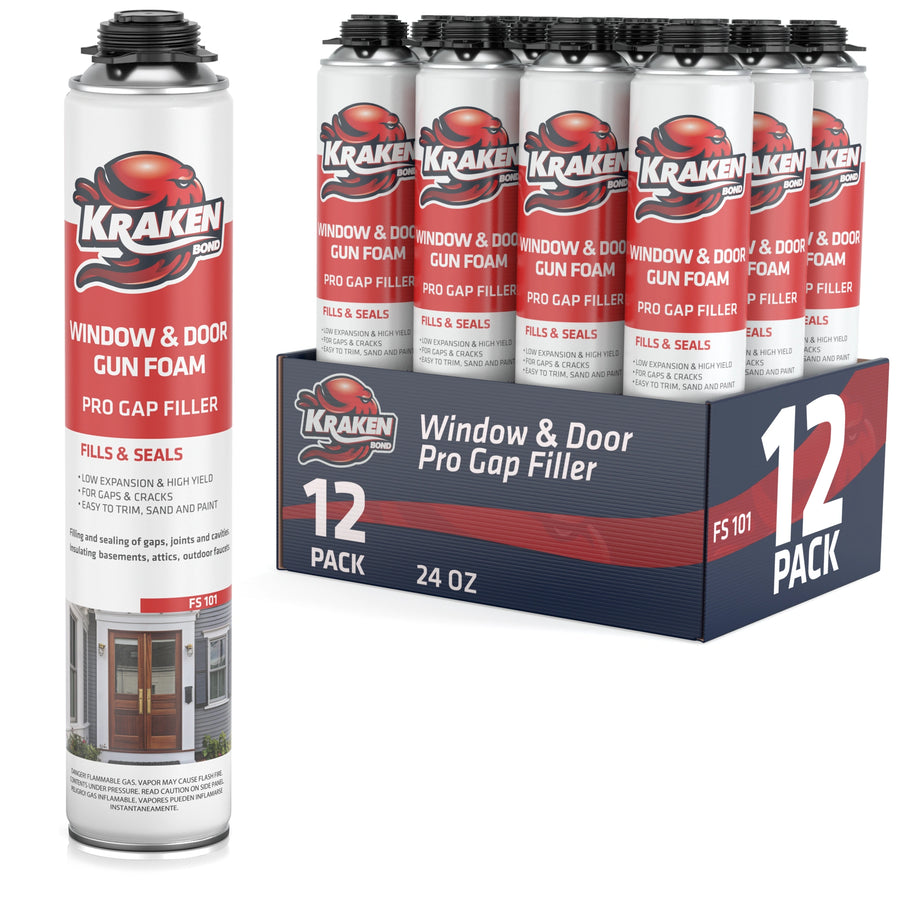
• DIY-accessible: Consumer cans (e.g., Kraken Bond FastCoat) require no professional equipment
• Lifespan: Properly installed closed-cell foam lasts the life of the structure
Kraken Bond's FastCoat Closed-Cell Spray Foam is Class A fire-rated, achieves R-6 per inch in a single pass, and is designed for DIY application on rim joists, basement walls, crawl spaces, and gap sealing around windows and doors. It handles the highest-ROI applications without requiring professional equipment.
Safety note: Ensure adequate ventilation when applying spray foam. Wear safety glasses and nitrile gloves. Turn off power before working near electrical boxes.
Free and Low-Cost Insulation Assistance Programs
• LIHEAP: Low Income Home Energy Assistance Program — provides weatherization support including insulation for qualifying households. Apply at acf.hhs.gov/ocs/liheap or call 2-1-1.
• DOE Weatherization Assistance Program (WAP): Free insulation and air sealing for income-qualified homeowners through local Community Action Agencies.
• State and Utility Rebates: $0.05–$0.20/sq ft for attic insulation at many utilities. Search dsireusa.org for your state.
Frequently Asked Questions About DIY Home Insulation
What is the cheapest way to insulate a house yourself?
The cheapest DIY approach is air sealing first (~$100–$200 in spray foam cans), then blown-in cellulose in the attic (~$300–$700 for 1,000 sq ft). Home improvement stores often provide blower rental free with bag purchases. Together these two projects deliver the fastest energy savings payback of any home improvement.
What is the easiest insulation to install yourself?
Fiberglass batts and rolled insulation are easiest — they fit between standard studs and joists and require only a utility knife and staple gun. For gaps and cracks, canned spray foam is even simpler and requires no preparation beyond cleaning the surface.
What are the best homemade insulation ideas?
The most effective budget DIY insulation approaches are: thermal curtains and door draft stoppers (under $30 per opening), reflective foil radiant barriers in attic rafters (effective in hot climates), and recycled denim batts as a non-irritating alternative to fiberglass. Avoid newspaper, cardboard, and loose fabric — these are fire and moisture hazards.
Can I do home exterior insulation myself?
Exterior insulation (EIFS or rigid foam cladding) is DIY-possible for single-story homes but more technically demanding than interior insulation. It requires precise integration around windows, doors, and roof edges to prevent moisture intrusion. Most homeowners should reserve exterior insulation for full renovation projects when cladding is already being replaced.
How often should home insulation be replaced?
Most insulation does not need replacement if kept dry. Fiberglass and mineral wool batts last 80–100+ years. Spray foam lasts the life of the building. Blown-in cellulose may settle and require topping off after 20–30 years. Any insulation that has been wet from a roof leak or flooding should be replaced — wet insulation loses R-value and promotes mold.
Where should you not use spray foam insulation?
Avoid spray foam near recessed lights without IC-rated covers (fire hazard), inside electrical boxes, on open-cavity roofs without vapor analysis in cold climates, and around garage door tracks (expansion can jam the mechanism). Use closed-cell foam (not open-cell) in below-grade applications.
Does spray foam insulation devalue a house?
No. Properly installed spray foam increases home value by improving energy efficiency ratings and demonstrating air sealing. Poorly installed foam that blocks required ventilation paths or covers electrical hazards can cause inspection issues. Always follow local building codes and obtain required permits.
Can mold grow on spray foam insulation?
Closed-cell spray foam is highly resistant to mold — it is an inert polymer with no cellulose and provides no food source for mold. Open-cell foam can retain moisture and should not be used in high-humidity or below-grade environments. For crawl spaces and basement walls, closed-cell foam is always the correct choice.
What areas of my home should I insulate first?
Priority order by ROI: (1) Attic floor — accounts for 25–30% of typical heat loss; (2) Air sealing all building envelope penetrations; (3) Crawl space or basement walls/ceiling; (4) Exterior walls; (5) Windows and doors via weatherstripping and thermal curtains.
Is spray foam worth the cost for DIY?
Yes, particularly for targeted applications. A $20 can of closed-cell spray foam applied to basement rim joists — a major air leakage point — can reduce heating costs by $50–$150/year in cold climates. Payback is often under six months. For large areas, two-component kits (like Kraken Bond FastCoat) cost more but deliver professional-grade thermal and moisture performance at significantly less than contractor pricing.


Author : Krakenbond Team
Let customers speak for us

Like it
Great product, easy to use.
we used it in our new bathroom. Easy to use works well!
I used the Kraken FastCoat Fire Rated spray foam insulation to seal rim joists in our basement.
The kit ordered came with everything I needed to get started. The spray foam, cleaner, and gun. Application was seamless. Following the directions provided, it foam went on evenly and adhered to not only the wood in the joists, but also the metal ducts present in some of the joist bays.
I was actually pretty impressed with it, which is saying a lot for me. The application I used it for, sealing joist bays to be air tight, worked extremely well. Ordering another case of it to use to air seal my attic.
Used it to insulate crawl space beneath the sun room. Excellent. Easy to use. No mess. Just wish there were more in the bottles.
When remodeling an existing full foam cavity fill project. This product is a geart solution for replacing areas of the existing that had to be removed during the remodel especialy when it isn't cost effective to have a commercial spray foam contractor out for touchup. Make sure to have enough cans to get it done. Touching up a 2' area of a full fill 2x10 floor joist will take about 1½ cans.

Great product! Easy to use and hoping it will last a long time. Great service and delivery experience for me.
Great fast option for repairs
great product
Definitely a learning curve in use, but over all great product.
Works great, easy to use and apply. Cans and cleaner very user friendly! tays warmer than previously!
Very easy to use and awesome product. Works very well and no complaints. Used it at home but would def use it at work if the company allowed but they have their own sources.
Easy to apply. Applied a 48 pack to my metal shed in less than an hour.
Great coverage and easy to use!
Was clean installation and delivered as much per ft. as advertised. Im placing another order. Full disclosure, I havent tried other brands, but I was happy. The cleaner works really well as well! I did a 2ft. Swath all the way around the base of my 40x48 shed with 24 cans.


Leave a comment